Hand Painted Kitchen Restore and Repaint in Liverpool for a Mark Wilkinson Cook’s Kitchen
Challenge
Now this was a great challenge of a kitchen to repaint.
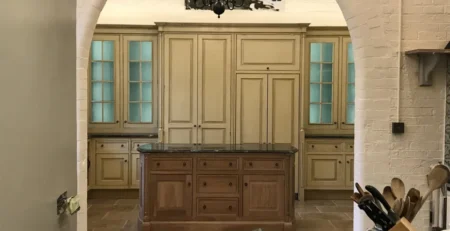
The client had refitted her old Mark Wilkinson Cook’s Kitchen into a new extension. The kitchen cupboards were redesigned, reconfigured and refitted. Alongside adding a further 2 parts of other Mark Wilkinson Cook’s Kitchen bought from people selling their old ones.
A genius use of eco-friendly sustainability to achieve a beautifully made bespoke kitchen from one of the leading manufacturers in the field.

Restoring the Kitchen
The challenge was in restoring and repainting it! 3 different colours in various qualities of quite hideous and rough repainted finishes all needed to be fully stripped back and restored.
This may sound biased, but after reading what is entailed in this whole process I am sure you will agree that you should only use a professional bespoke kitchen painter. Just look at the detail of the start of the restoration in the photographs to confirm this.
I extensively test products for adhesion and durability always remaining ahead of the market. This ensures that both myself and client have the best starting blocks to embark on the repainting of their kitchen.
Firstly, all surfaces were degreased ( the downside of upcycled and existing kitchens needing repainting ). The grease must be removed to ensure the best possible adhesion.
Then an intensive sand using a full Festool sanding and dust extraction system was used. The restoration was completed with repairs and damage being filled with a 2pack filler and a further sand, caulk and dust down.
Colour Consultation
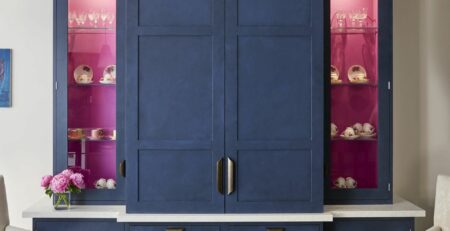
The colour consultation was next. Generally the client will have an idea from a colour card of the colour they are trying to achieve. I’d say that 95% of these ideas are slightly off. That is because to accurately choose an exact colour for their kitchen the client needs a large sample in the actual paint and sheen to be used. This allows for light bounce and colour saturation idiosyncrasies. It was exactly so with this client. My clients tend to be discerning and require a certain level of detail and pedantry in getting the colours exactly right. With this in mind and with the client present, I began with suggesting painted samples within my library. I then remixed, tinted, adjusted and tweaked the paint until it was exactly correct, providing further samples for the client’s approval. In the end we went for a dark sultry tyrian grey for the island and a warm pale grey for the peripherals.

Hand Painting the Kitchen
Then onto hand painting the kitchen. I used an oil based coloured adhesion primer as there were so many layers of paint on this kitchen and as paint has a memory and can absorb oily deposits, this primer overrides the problem. The adhesion primer coat took 16 hours to cure and was then lightly sanded and dusted off.
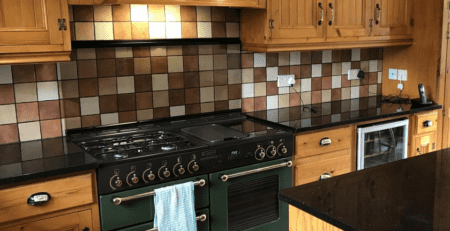
2 coats of specialist acrylic topcoat was applied. I chose a 20% sheen for the topcoat of this kitchen giving a luscious waxy sheen that really worked well with the design and colour.
Once all the kitchen had been successfully painted, it was time to unmask and reassemble. This is my most satisfying part of the process. Seeing all your hard work covering 3 weeks come together and the client being completely delighted with her kitchen transformation that has cost her a fraction of the price of a brand new bespoke Mark Wilkinson kitchen.